

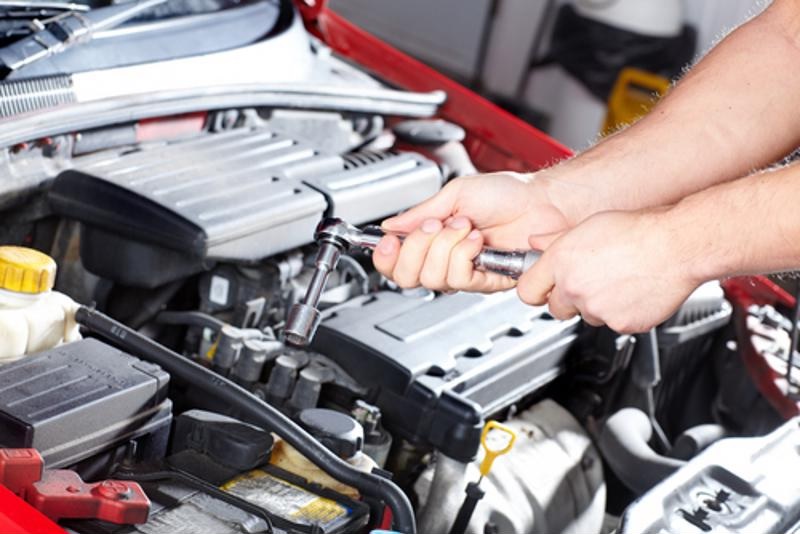
Stepping on the brake pedal should yield a predictable, progressive response that brings your vehicle to a smooth and controlled halt. When you press your foot downward and instead encounter a pedal that feels stiff, unyielding, and as hard as a brick, panic often sets in immediately. This terrifying phenomenon—commonly known as a hard brake pedal—means you have lost power brake assistance. Without mechanical or vacuum amplification, bringing a multi-thousand-pound vehicle to a stop requires immense physical strength, turning an ordinary commute into a dangerous driving emergency.
Modern braking systems rely heavily on vacuum power assist to multiply the force of your foot. When a hard pedal occurs, the root cause almost always points to the vacuum supply or the booster mechanism itself. Two primary components stand at the center of this malfunction: the brake booster and the vacuum check valve. While both issues produce the exact same frightening symptom, their repair complexity, parts cost, and diagnostic procedures differ drastically. Pinpointing whether you are dealing with a simple valve failure or a degraded booster diaphragm is essential for an effective repair.
The Mechanics of Power Braking: How Engine Vacuum Creates Stopping Power
To understand why your brake pedal suddenly feels like concrete, you must first understand how power brakes operate. In most gasoline-powered vehicles, the engine creates natural vacuum pressure in the intake manifold during the normal combustion stroke. This engine vacuum is harnessed to assist the driver through a metal canister mounted on the firewall, known as the brake booster.
Inside the brake booster, a flexible rubber diaphragm divides the housing into two chambers. When your engine is running, vacuum is pulled on both sides of this diaphragm. When you press the brake pedal, a valve opens to let atmospheric pressure into the rear chamber. The pressure differential—vacuum on one side and atmospheric pressure on the other—pushes the internal diaphragm forward. This physical movement multiplies the pressure applied to your master cylinder, meaning your leg effort is amplified significantly before hydraulic fluid is pushed to your brake calipers.
If that vacuum source is interrupted, or if the booster loses its ability to hold vacuum, the amplification vanishes. You are left relying solely on your leg muscles to push fluid through the brake lines, resulting in the dreaded hard pedal.
Anatomy of the Culprits: Vacuum Booster Versus Check Valve
When troubleshooting a hard pedal, technicians look closely at the components responsible for creating and storing that vital vacuum reserve.
The Vacuum Check Valve
The vacuum check valve is a small, unassuming plastic or brass one-way valve located inline between the intake manifold and the brake booster. Its sole purpose is to allow air and vacuum to be pulled out of the booster while preventing air from flowing back in.
Because the engine produces varying levels of vacuum—especially during acceleration when the throttle opens wide and manifold vacuum drops—the check valve acts as a holding tank protector. It traps vacuum inside the booster canister so you retain power brakes even if you accelerate or shut off the engine. When this valve fails, vacuum bleeds away the moment the engine stops running or changes load, leading to a hard pedal immediately upon startup or after the car has been parked.
The Vacuum Brake Booster
The brake booster itself is a sealed, drum-like canister. Over time, the internal rubber diaphragm can dry out, crack, or tear. Furthermore, the metal housing can rust, or the seals where the master cylinder bolts to the booster can degrade. When a booster develops an internal or external leak, it can no longer maintain the pressure differential required to assist your braking input. Unlike a failed check valve, which is an external component that can be replaced in minutes, a failed booster requires major labor to swap out.
Symptoms of a Hard Pedal: Clues for Differential Diagnosis
While both a bad check valve and a leaking booster result in high pedal effort, subtle operational clues can help you distinguish between the two before you pick up a wrench.
If your brake pedal feels normal while the engine is running, but turns rock-hard the moment you turn off the car and press the pedal a second time, you are likely experiencing a check valve failure. A healthy check valve should trap enough vacuum in the booster to give you two or three power-assisted stops even with the engine off. If the pedal is hard instantly, vacuum is escaping backward through a stuck or broken valve.
Conversely, if the pedal remains hard even while the engine is running, or if you notice a distinct hissing sound from underneath your dashboard whenever you press the brake pedal, the booster itself has likely failed. A hissing sound indicates that atmospheric air is rushing through a torn internal diaphragm or a damaged gasket directly into the cabin.
Diagnosing a Faulty Check Valve
Testing a vacuum check valve is straightforward and requires minimal tools. You will want to locate the rubber or plastic hose running from your intake manifold to the front of the brake booster. The check valve is typically integrated directly into this hose assembly or plugged into a grommet on the booster shell.
Disconnect the hose assembly from the brake booster end while leaving it attached to the engine or holding the standalone valve. Try blowing air through the valve in both directions. Air should flow freely toward the engine or in the direction of the intended vacuum draw, but when you attempt to blow air toward the booster side, the valve must seal completely and block airflow. If air passes through in both directions, or if it fails to seal, the check valve is broken and must be replaced.
Another common field test involves starting the car, letting it idle for a minute, and then shutting off the engine. Wait five minutes, then press the brake pedal. If the first press is hard, the check valve is not holding the vacuum reserve.
Diagnosing a Vacuum Booster Leak
If the check valve passes inspection, your diagnostic focus must shift directly to the brake booster unit and its associated vacuum lines. Inspect the entire rubber hose running from the engine to the booster for cracks, dry rot, pinhole leaks, or loose clamps. A compromised hose mimics the exact symptoms of a bad booster.
Next, perform the pedal depression test. With the engine turned off, pump the brake pedal several times to bleed out any remaining residual vacuum until the pedal feels hard. While keeping moderate, steady pressure on the brake pedal, start the engine. A healthy brake booster will cause the pedal to sink slightly beneath your foot as the engine starts and vacuum assistance kicks in. If the pedal remains completely rigid and refuses to drop when the engine fires up, the booster is failing to process the vacuum signal, pointing squarely to a ruptured internal diaphragm or a blocked input port.
You should also inspect the rear of the booster where it enters the passenger compartment beneath the steering column. If a master cylinder seal has failed, brake fluid can leak backward past the pushrod and pool inside the booster. This fluid destroys the rubber diaphragm rapidly. If you disconnect the vacuum line and find brake fluid inside the port, both your master cylinder and your brake booster require immediate replacement.
Step-by-Step Replacement and Repair Considerations
Replacing a vacuum check valve is one of the easiest DIY automotive repairs possible. You simply unclamp the old valve from the vacuum hose, slide a new replacement valve into position, and secure the clamps. Parts typically cost very little, and the job takes less than ten minutes.
Replacing a brake booster, however, is significantly more labor-intensive. It is located deep in the engine bay against the firewall, often partially obscured by wiring harnesses, fluid reservoirs, and steering columns. To replace a booster, you must unbolt the master cylinder from the front of the booster without opening the hydraulic brake lines if possible, working carefully to avoid introducing air into the system. Underneath the dashboard, you must disconnect the booster pushrod from the brake pedal assembly, which often requires working in tight, uncomfortable contortions.
Because of the labor involved and the critical safety nature of the braking system, many vehicle owners choose to entrust a brake booster replacement to a professional mechanic. Driving with a compromised booster compromises your stopping distance and places immense strain on your physical endurance during panic-stop scenarios.
Conclusion: Making the Right Repair Choice
A hard brake pedal is a critical warning sign that demands immediate attention. Whether the culprit is a small, inexpensive plastic check valve or a fully degraded vacuum brake booster, ignoring the symptom invites catastrophic brake failure. By understanding how engine vacuum powers your stopping ability and systematically testing both components, you can accurately identify the root cause of the failure. Addressing the issue promptly ensures that your vehicle remains safe, responsive, and ready to handle whatever the road throws your way.
Comments are closed.